LED strip lights have become a popular choice for lighting up homes, offices, and creative spaces, offering a blend of flexibility, energy savings, and stunning visual effects. Often called “LED cable lights”, these slim, adaptable strips are ideal for everything from understated decor to bold, colorful displays. But one question frequently pops up: “Do all LED strip lights use the same connectors?” The short answer is no—while some share common connector designs, differences in type, voltage, and purpose create a diverse landscape. This guide takes a deep dive into the world of LED strip light connectors, breaking down their varieties, compatibility hurdles, and handy tips to ensure your next lighting project shines brightly.

What Are LED Strip Light Connectors?
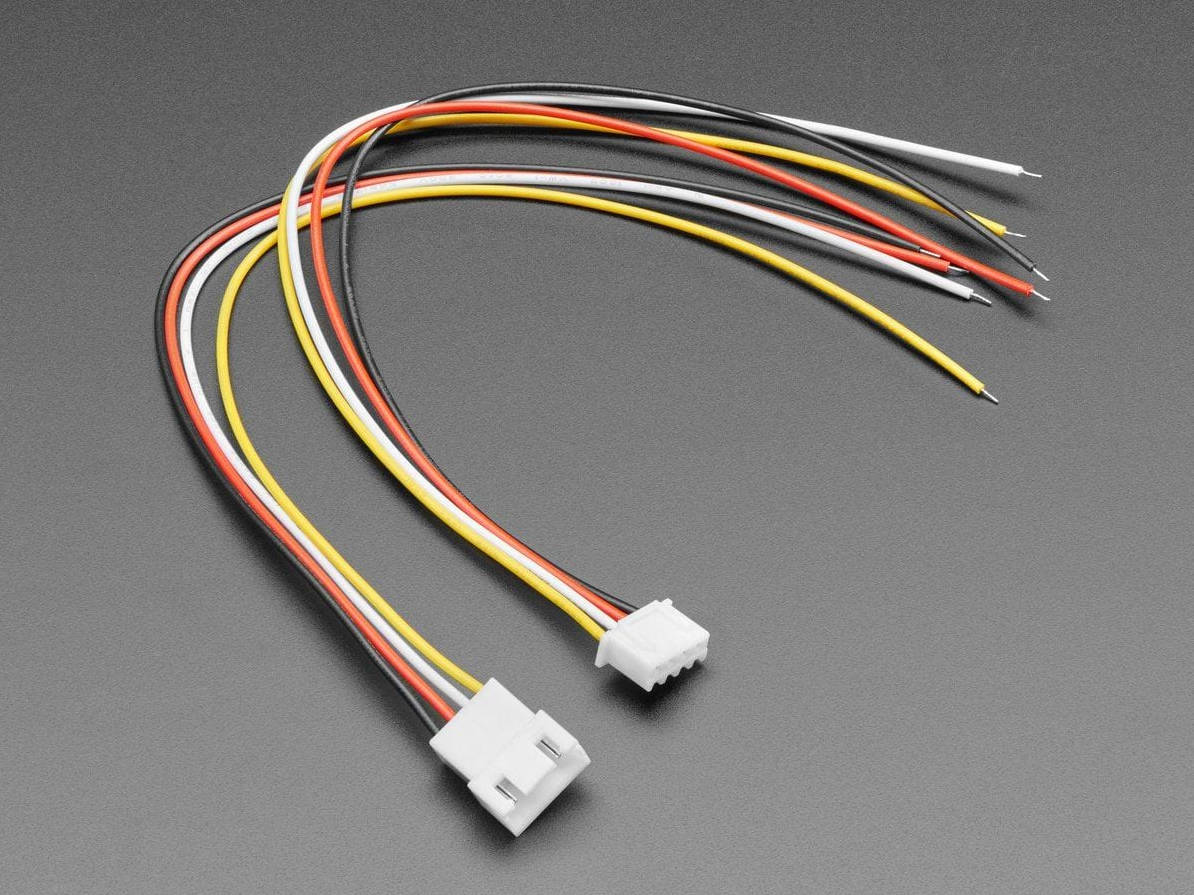
Connectors are the vital links that make LED strip light setups work smoothly. These small but mighty components—often dubbed “LED light strip plugs“—join strips together, attach them to power sources, or link them to controllers. Without connectors, you’d be stuck soldering wires or wrestling with complex setups, which can intimidate newcomers and slow down even seasoned DIYers. By using connectors, you can customize and extend your “LED cable lights” with ease, achieving professional results without breaking a sweat. However, not all connectors are created equal, and their differences can make or break your installation.
Exploring the Types of LED Strip Light Connectors
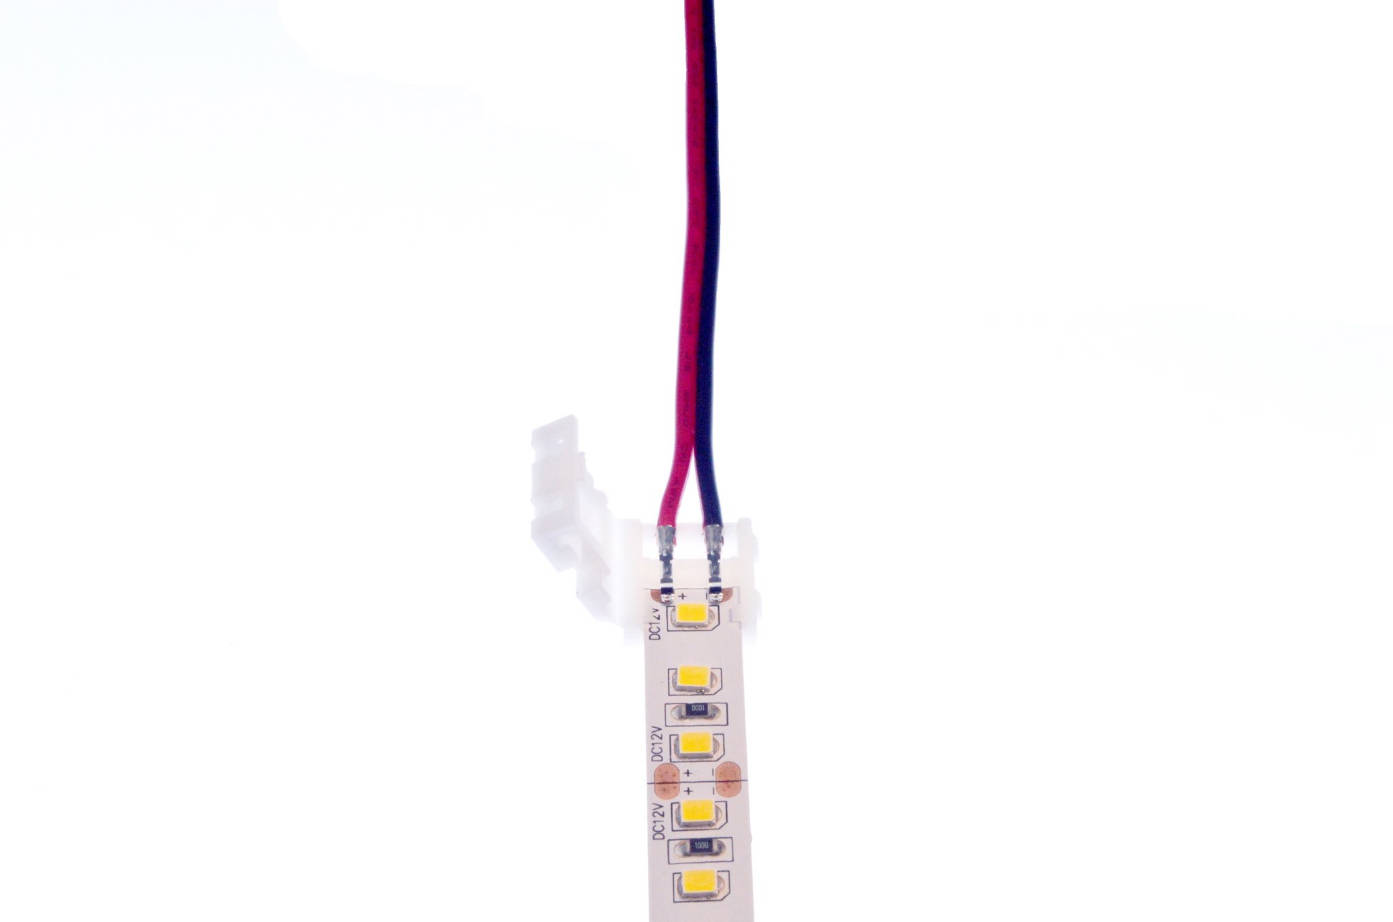
LED strip lights come with a range of connectors, each suited to specific tasks. Standard connectors, like 2-pin for single-color strips and 4-pin for RGB strips, are the go-to options for most projects, offering broad compatibility across brands. Beyond these basics, specialized connectors cater to unique needs: waterproof ones shield against moisture, high-voltage types handle bigger jobs, and proprietary designs tie you to specific ecosystems. Understanding these options is the first step to picking the perfect fit for your “LED light cable” setup.
Here’s a breakdown of the main connector types:
| Connector Type | Description | Best For |
| 2-pin | Simple design for single-color strips | Indoor accents, basic lighting |
| 4-pin | Supports RGB color-changing strips | Mood lighting, dynamic displays |
| Waterproof | Sealed to resist water and dust | Outdoor use, kitchens, bathrooms |
| High-voltage | Built for higher power demands | Large-scale or industrial setups |
| Proprietary | Custom-made for specific brands | Brand-specific systems |
This table is your quick guide to matching connectors with your project’s needs, ensuring you’re equipped for success.
Why Compatibility Matters—and How to Fix It
Getting connectors to work seamlessly with your LED strip lights isn’t always straightforward. Voltage and current alignment is critical—mismatched ratings can cause overheating, dimming, or damage to your “LED strip plug” and strip. Physical fit is just as important: connectors differ in size, shape, and pin layout, and a mismatch can leave you with loose or useless connections. Don’t worry, though—there are solutions. Adapters can connect mismatched types, converters can tweak voltage or current, and DIY tweaks can work in a pinch (just proceed with care to avoid risks). Knowing these fixes keeps your project on track.
How to Pick the Right Connector
Choosing the right connector doesn’t have to be a guessing game. Start by checking the manufacturer’s specs—manuals, packaging, or websites usually list the exact “LED light strip plug” you need. If that’s not an option, inspect the strip itself: count the pins, note the shape, and look for markings. For extra confidence, a multimeter can test compatibility, but safety first—if you’re unsure, ask an expert. These steps ensure your “LED cable lights” connect perfectly and perform at their best.
Step-by-Step Installation Guide
A smooth installation keeps your LED strip lights glowing strong. Here’s how to nail it:
- Gather Your Gear: Collect your strips, connectors, power supply, and tools like scissors or a screwdriver.
- Set Up Your Space: Work in a clean, well-lit area to avoid damaging parts.
- Connect with Care: Align the “LED strip plug” with the strip’s contacts, press firmly, and secure with tape or clips if needed.
- Test and Troubleshoot: Power it up. If it flickers or fails, recheck alignment, clean contacts, or swap the connector.
These steps make setup simple and stress-free, whether you’re a beginner or a pro.
Keeping Your Connectors in Top Shape
To get the most out of your LED strip lights, maintain their connectors. Check them regularly for wear—corrosion, bent pins, or looseness signal it’s time for a replacement. Clean them with a dry cloth to remove dust; skip harsh cleaners that could harm them. For a longevity boost, consider upgrading to sturdier or specialized connectors. With a little care, your “LED light cable” system will stay reliable for years.
Wrapping Up: What You Need to Know
Not all LED strip lights use the same connectors, and that’s the key takeaway. Variations in design, voltage, and application mean you’ll need to match connectors to your specific strips. By understanding connector types, tackling compatibility issues, and following best practices for selection and upkeep, you’ll set yourself up for lighting success. If you’re ever stuck, lean on manufacturer advice or expert help—your perfect setup is worth it.